Until a few months ago, I was happy with my previous electricity provider. A short time later, however, came the nasty surprise. My monthly fee went up from 42€ to 66€. This meant that the previous contract was no longer attractive.
I’ve been interested in having my own solar panels on the balcony for a while. I have so much unused space. Due to the energy crisis, bureaucratic hurdles in Germany for balcony power plants were removed. The stars were right and I took this opportunity to become a little more self-sufficient.
Electricity tariff
What’s next with my electricity provider?
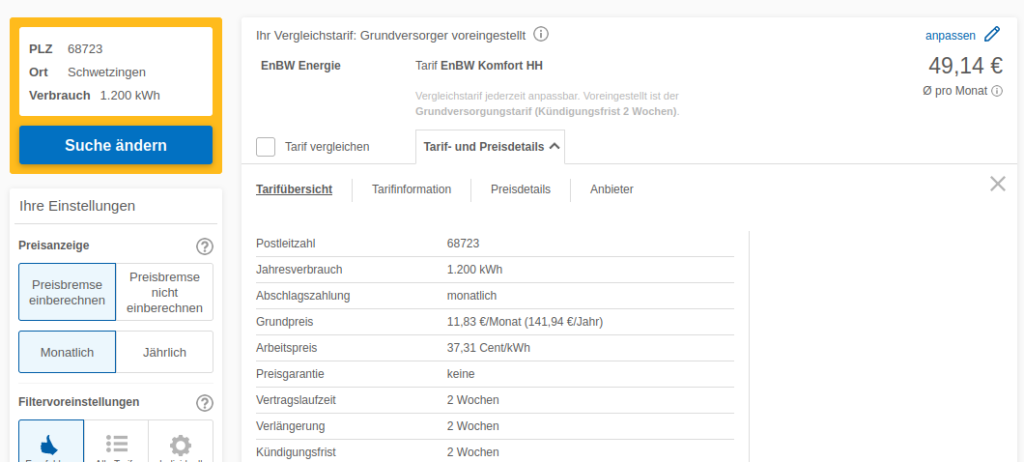
A look at the basic utility tariff showed that canceling is definitely better than accepting the contract change with my previous provider. I did that and am now back with EnBW. The conditions at EnBW were quite attractive. The basic price is lower, the energy price higher, than with comparable other tariffs. This means that the more electricity I produce, the more I save proportionally.
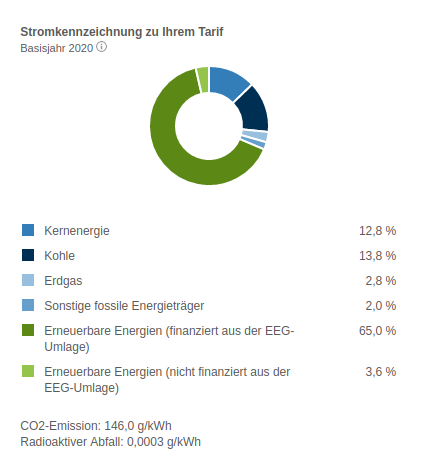
A decisive disadvantage, on the other hand, is that I also get electricity from coal and nuclear energy here, which I don’t think is okay. Therefore, this is a temporary solution until I find a satisfactory tariff.
Legal
For many questions and answers, Heise has published a catalog of frequently asked questions. A few of the most important aspects.
VAT
For balcony power plants and their accessories the VAT is omitted since 2023-01-01. That means they are about 19% cheaper to buy than before.
Permission from the landlord
If no structural changes are necessary for the installation of the solar cells, no permission from the landlord is required. I anyway wrote a short mail to my landlord, informed him about the installation, and gave room for concerns.
Registration
For the registration of balcony power plants the filling out of a simplified form is sufficient. At EnBW, a descriptive checklist can be found here. The effort to fill out the form and register in the market master data register is no more than 30 minutes.
Balcony Power Plant
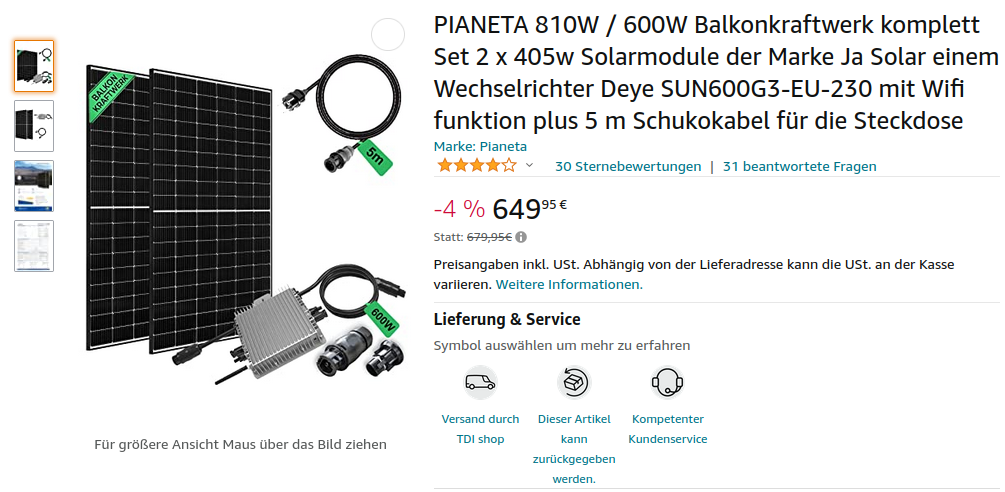
I ordered my power plant on Amazon. In the package are two solar cells, a Schuko cable and an inverter with W-LAN.

In addition, I ordered mounts for the solar panels. The mounts provide on the one hand a better shifting of the weight, on the other hand it allows an inclination of the panels to the sun, so that the performance is improved.
Costs and Yield
The solar cells cost 650€, the mounts 110€, other accessories (cables, Schuko adapters, steel cables, clamps) cost 90€. In sum about 850€ for all the objects. I do the installation myself.
The inverter has a maximum power of 600 watts. I live in a part of Germany where the yield with solar cells is the highest. I estimate that it will produce about 350kWh of electricity per year. That is more than 1/4 of my total electricity consumption. At a price of about 0,40€ that is 11€ per month I should save in electricity costs. This means that the balcony power plant will pay for itself in about 6 years.
Installation
For the installation I considered many different alternatives. At the top of the list for me were 3D modelled connectors made of PETG. PETG withstands outdoor conditions and can withstand a lot more than PLA. After a few endurance tests, it became clear that PETG is also not suitable for carrying a lot of weight. Therefore, the choice has focused on steel parts. Here I experimented a bit and in the end I was very satisfied with simple screw clamps and steel cable.
A big challenge was the wiring. I don’t have a power connection on my balcony. How do you get power to the balcony without making permanent changes to the balcony doors and windows? I found, after a thorough inspection of the doors, that the door has holes in it that are probably meant to let water through. I got a slightly thinner cable and ran the wiring through this hole, and wired the Schuko adapters.
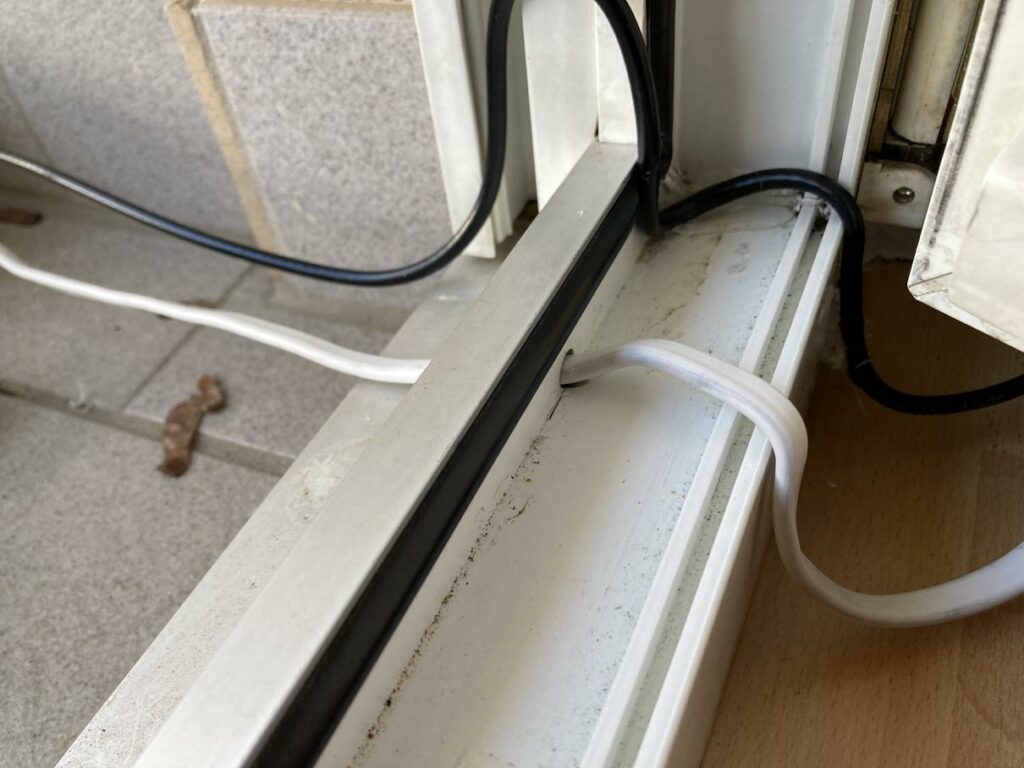
This is not the best solution, but still worked in the end without drilling the door. Basically it doesn’t even need a hole. The door seal is also soft enough to run the cables through. I fix the whole thing with hot glue, which is also very easy to remove afterwards. The white cable is my power cable, the black cable is my antenna cable for my LoRaWAN antenna.
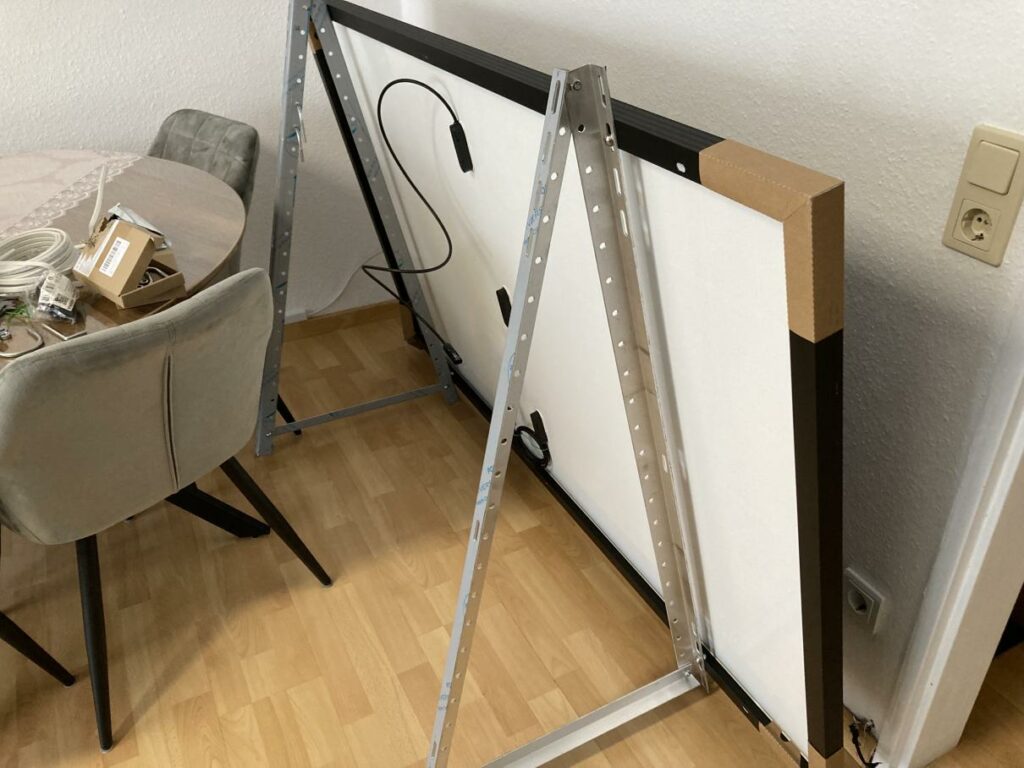
Before the test, I test-fitted the brackets without the solar cell and after the tests were also successful, nothing stood in the way of the installation.
Commissioning
Since my inverter is also W-LAN capable, the data about the electricity produced is collected and displayed in an app.

Today was a cloudy day and 0.5 kWh of electricity was produced. With my average consumption of 3.4 kWh per day, about 15% was covered by my solar cells today.
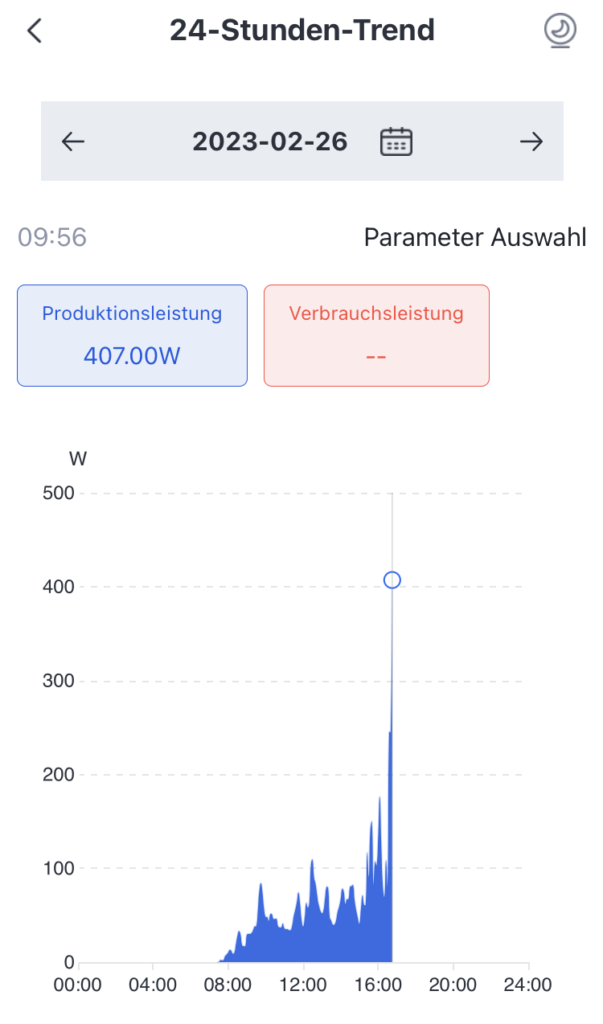
On a sunny moment on a cloudy day, the production went up to 407 watts. I can monitor the whole thing via the app.
Result
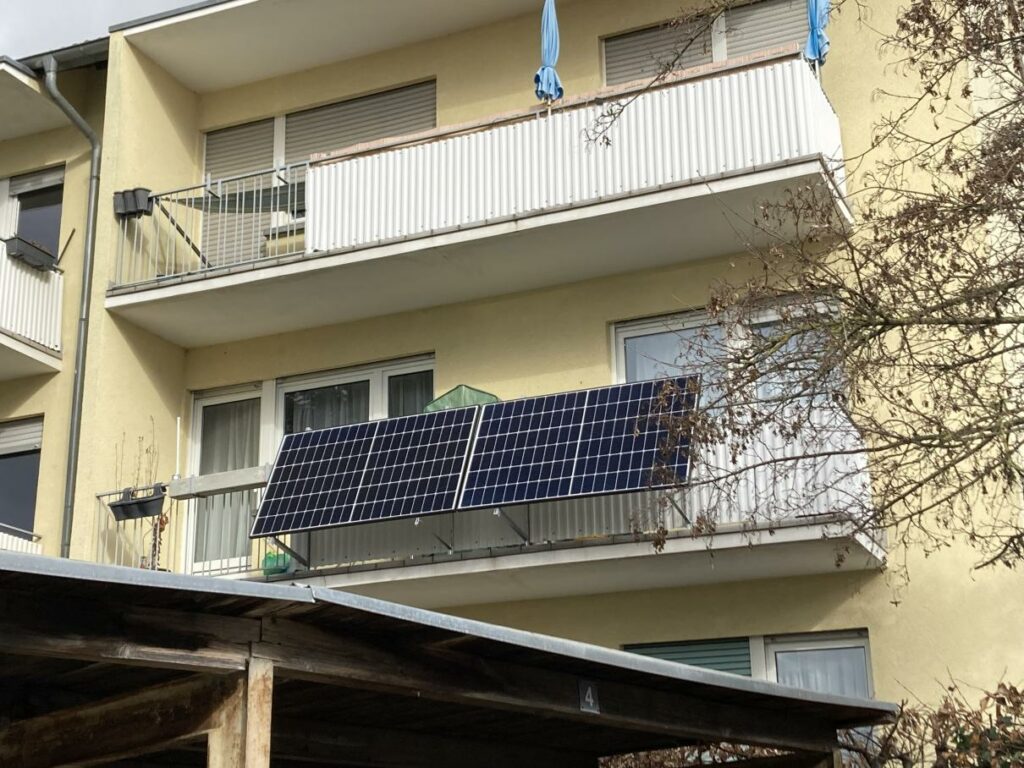
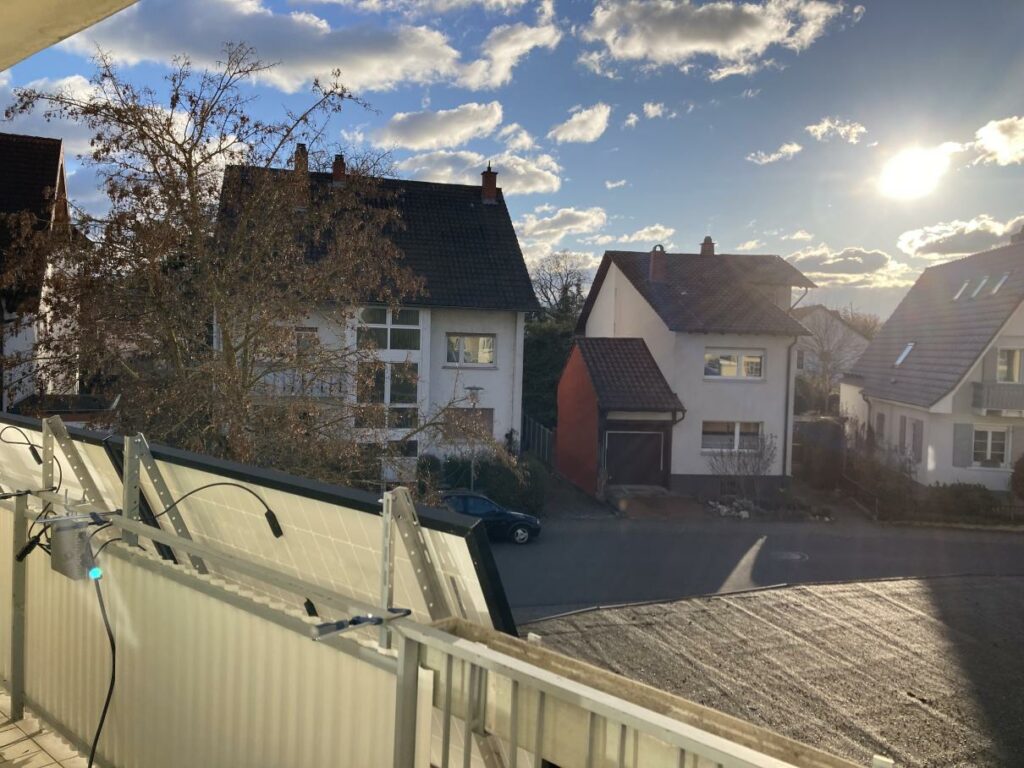
The result is impressive! The construction is very stable and my solar cells produce electricity. My balcony is now decorated with solar cells in addition to my LoRaWAN antenna. As a self-supporter, I have taken an important step.